Category Archives: Vegan

Day 21–Vegan Challenge Finished, So Why am I Cooking Mushrooms?

Either vegan or with a dusting of Parmesan, Midweek Mushroom and Orzo is wholesome, delectable and a quick, inexpensive luxury.

Either vegan or with a dusting of Parmesan, Midweek Mushroom and Orzo is wholesome, delectable and quick enough for a midweek dinner.

Okay, for those of you who can tell time, I actually finished the challenge at the beginning of the week with a gigantic vegetable splurge at Calafia, a restaurant that caters to pretty much any kind of finicky eater.  The splurge was delicious, a plate of cauliflower puree, roasted beets, garbanzo beans, kale, broccolini and probably a couple of other things.  Perfectly balanced as far as color, taste and texture went.  And if I weren’t doing the vegan challenge, I would never have ordered it.  (I’d have been too busy salivating over the duck pizza.)

Which is, perhaps, the real point of doing this sort of thing–to change old habits, and remember just how wonderful something like a cauliflower can be.  Yes, I thoroughly enjoyed the fresh cinnamon roll I had the next day, but I was able to eat it mindfully rather than as something I craved because my blood sugar had been skyrocketing up and down.

As a result, when I hit the farmer’s market the next morning, I, well, thought like a vegan–what vegetable was going to be the basis of dinner?  When I saw a $3 box of some sort of local white mushroom (oyster?), I simply grabbed it.

Once at home, I promptly got out my little bag of dried mushrooms and set about making stock.  I love mushroom stock–it is so insanely simply and reliable.  I mean, take two pieces of dried mushroom, some onion, carrot and a tough celery rib.  Add water, simmer for 20 minutes and you’re good to go.  If that’s too much effort, you can get a basic stock simply by soaking that same dried mushroom in hot water.

Once the stock was done, it was simple of matter of waiting ’til near dinner and then trying out some whole-wheat orzo I’d picked up, combining with sauteed mushrooms and onions, adding the stock and cooking like rice for 20 minutes.

While I found most whole-wheat pasta a bit mealy, whole-wheat orzo didn’t have that problem–the small size of each piece, perhaps, keeps it from being that way.  The mushrooms worked well with the heavier flavors of the whole-wheat pasta.  I did allow myself a little grated parmesan–just to remind myself I wasn’t a vegan–but it wasn’t really necessary.

As an added bonus, the next day I zapped the leftovers in the microwave for lunch–it was excellent as, I suspect, it would be at room temperature.  It’s also cheap, convenient and matches up nicely with a green salad, which is my lazy vegetable go-to this time of year.  I’m in California and winter is lettuce season here.  If this isn’t an easy option for you, any dark-green leafy vegetable will do–yes, even frozen, just don’t overcook and give it a squeeze of lemon.  (Lemons are also in season right now.)

Midweek Mushrooms and Orzo

3 cups mushroom stock (1 pieces dried mushroom, 1 small carrot, 1/4 c. onion, salt, 1 bay leaf)
1 box of mushrooms–any will do–crimini is better than button if available.
4 T extra virgin olive oil
1 shallot
1/4 onion
salt and pepper
lemon or vinegar
fresh-grated parmesan cheese (very optional)

At some point, at least 40 minutes before you want to eat, but probably no more than three days ahead, make the mushroom stock.  Pour 3 cups of water into a sauce pan, add two dried slices of mushroom (they don’t have to be big), a cleaned and roughly chopped small carrot, a couple of slices of onion, some salt and about six inches of an outer celery stalk (leaves are good) also roughly chopped.  Toss in a bay leaf. Bring it all to a boil, reduce heat and let simmer for 20 minutes.  Remove from heat, strain.  Retrieve the dried mushroom pieces and chop into a couple of pieces–you’ll add them to the orzo with the rest of the mushrooms.

About 30 minutes before dinner, clean and slice mushrooms, discarding the dirty bottoms and anything questionable.  Start reheating mushroom stock.  Chop onions and shallot into medium-sized pieces.  Heat half the olive oil in heavy bottomed saucepan over medium heat, when read, add onions and shallot, reduce heat and cook gently ’til soft.  Remove onions and shallots and then, in batches, cook mushrooms til golden, adding salt and pepper adding more oil as needed.  When mushrooms are finished, add the last of the oil and then the orzo, quickly coating it with oil and sauteeing it a minute.  Add the mushrooms, onion and shallot,  mix and then pour on the mushroom stock.  Bring to a boil, then reduce heat to low, cover the pot and simmer for 20 minutes.

After 20 minutes, check orzo, stir, add a touch of lemon or vinegar, taste and correct seasoning.  Serve with something leafy and green and pass with parmesan cheese if you’re feeling optional.

Serves four.

Vegan Challenge Day 20–Winding Down, but first, when pasta takes too long.

Whole wheat gnocchi and Cauliflower make for a healthy and *fast* dinner.  The gnocchi cooks in 3 minutes.

Whole wheat gnocchi and Cauliflower make for a healthy and *fast* dinner. The gnocchi cooks in 3 minutes.

So, nearly done with my vegan/no-white-sugar or flour challenge.  While a couple of people (okay, my kid’s piano teacher) suggested sticking with it ’til the end of January, I’ve hit the point where I’m ready to bring back other foods into my diet.  My jeans are looser, I feel better and, just as important, I’ve found some wonderful new recipes that I’m going to continue making.  I also don’t feel compelled to eat sugar all the time–which was really getting to be a problem over the holidays.  Sweets should be a treat, not an addiction.

But, anyway, back to dinner.  While I’m generally happy to chop away at vegetables and spend my time building a good vegetable stock, there are times when I don’t have the time to do that.  Last Wednesday was one of these.  I literally had 20 minutes between the time I got home and the time I had to leave for a school meeting.  And I was hungry.  I need real food, not a snack.

Fortunately, I’d picked up some whole-wheat gnocchi on sale.  Reading the instructions, I realized that while pasta takes 8-10 minutes to cook, gnocchi only takes 2-3.  Furthermore, it’s really easy to tell when its done–the little dumplings just float to the top.

Looking in the fridge at my array of sturdy winter vegetables, I grabbed the cauliflower.  After a little sauteeing in olive oil, I tossed gnocchi and cauliflower together and I was done and I still had five minutes to eat.  Nourishment accomplished.

And, oh yes, it was really good.

Cauliflower and Gnocchi Speed Date

16 oz package (2 c.) of packaged whole-wheat gnocchi
1/2 head medium-sized cauliflower
1/4 c. shallots or onion or combination
4 T extra-virgin olive oil
salt
pepper
lemon juice
parsley (optional)

Run in the door, fill large saucepan with 2-3 quarts water.  Stick it on the stove and crank up the burner as high as it will go.  Salt the water.

(Grab salad mix from fridge, rinse, shake or spin dry.  Toss into salad bowl.  Add salt and pepper to taste.  Rinse colander and put it back over the sink to drain the gnocchi.)

Chop onion/shallots into medium dice.

Rinse cauliflower well.  Chop into fairly small florets.  Include small stem pieces, but not the main stalk.)

Check on water.  If starting to bubble, pour 3 T of olive oil into frying pan to high.  Once hot, reduce to medium, add onion/shallot and start cooking ’til softened.  Meanwhile:

Check water again.  Should be boiling.  Dump in gnocchi.  Bring back to boil.  Boil two-three minutes until gnocchi floats to the top.  While waiting for gnocchi:

Dump cauliflower into frying pan.  Add salt and pepper.  Increase heat to medium.  Cook cauliflower  3-4 minutes.  It should start to brown around the edges.  While it’s getting there, however:

Drain the gnocchi.

When cauliflower is ready, add drained gnocchi to frying pan.  Add last T. of olive oil and lemon juice.  Toss together in pan, adding salt, pepper and parsley to taste.

Dump into serving bowl.  Use leftover lemon and oil to dress salad.  Toss this.

Make sure burners are turned off.

Run to table  (but only if floor’s not slippery.) Take deep breath.   Eat.

Run out door to meeting.  The dishes will wait.


Vegan Challenge Day 15–The Joy of Crunchy Potatoes or Meet Potatoes Ana

Potatoes Ana uses coconut oil, a sweet potato, lime, shallots and ginger to give a tropical vegan update to the French classic.

Potatoes Ana uses coconut oil, a sweet potato, lime, shallots and ginger to give a tropical vegan update to the French classic.

Okay, so it’s not hard to make crunchy potatoes, but I had my eye on elegant, centerpiece crunchy potatoes.  In other words, I wanted a vegan version of Potatoes Anna, which is traditionally made by drizzling layers of potatoes with lots of delightful butter and salt, which results in layers of incredibly rich, crunchy goodness.  Fine, I thought, the first time I tried it, I’ll do it with olive oil.  This resulted in a tasty, but gloppy and oily mess.  Liquid fats, I realized, were not going to do it.  So, I turned to coconut oil, which, like butter, is solid at room temperature.  But coconut oil has its own flavor profile; its own culinary buddies.  I didn’t want to simply make a pallid vegan imitation of the real deal (just one of the many reasons I won’t use margarine.), but something that stands up on its own.  Something with a little tropical flair.

I give you Potatoes Ana,  A sweet potato hangs out with the potato-potatoes.  The rich sweetness of the tubers and the coconut oil is balanced by shallots, a touch of fresh ginger and lime.  The following will serve four if none are teen-agers, but an easy way to think of this is one potato per person as a main course, half a potato as a side.  Potato/sweet potato ratio should be 2:1 or 3:1.  So get out your large cast-iron skillet and, if you’re lucky, a mandolin slice (watch your fingers) and give this a go.

Potatoes Ana

2 large baking potatoes
1 sweet potato of similar size
1/4-1/2 c. coconut oil.
1 shallot (or more.  Onions will also work in a pinch) chopped on the fine side
1/2″ of smallish knob of ginger (1-2 t. freshly grated)
1 large lime
salt and pepper

Preheat oven to 400 degrees.
Wash, peel and thinly slice the potatoes and sweet potatoes.  A mandolin is very useful here (I use the III setting).  Cover potatoes.  In a large (I use a 10-inch one) cast iron skillet, heat half the coconut oil on high.  When hot, add the shallots and reduce heat to medium low.  After a couple of minutes, add the ginger, some salt, pepper and the zest from the lime.  Cook another couple of minutes until the shallots are soft and just beginning to brown.  Remove shallots, ginger, zest and pour off oil into a container.  (They can all go in one container).  Reduce heat to low (or turn off if using an electric stove.)  Take the potatoes and place one slice at a time in the bottom of the pan in concentric circles with each slice overlapping the next one slightly.  When bottom of the pan is covered, drizzle with a bit of the oil/shallot mixture and salt and pepper light.  Then create a layer of sweet potato on top of this, again drizzling with the oil mixture and seasoning lightly.  Repeat, alternating layers until the potatoes are used up.  If you run out of oil, dot the potatoes with unmelted oil.  Finish with a layer of potato, dot with oil and season a bit more heavily than you have the other layers.  Squeeze half a lime over the potatoes and then place the frying pan on the lower shelf of your oven.  Bake 30-40 minutes until top has started to brown and the potato cake has pulled in slightly from the edges and can be slipped easily from the pan.

Place serving dish over the frying pan and then invert frying pan.  Potatoes should flip out, though a few on the bottom may stick.  In which case, wedge a spatula underneath them and flip them carefully on top of the cake.

Use long knife to cut the potatoes into wedge.  Serve with a wedge of lime for squeezing over the potatoes and a green salad to balance out the richness of the potatoes.

Vegan Challenge–more than halfway–but, first, Dinner for Eight

Spicy Carrot Soup with Lima and Harissa, makes for a savory starter or a filling lunch

Spicy Carrot Soup with Lima and Harissa, makes for a savory starter or a filling lunch

There are times when life gets in the way of one’s intent to blog.  First obstacle was simple and food-related.  I made cabbage rolls that were good, but not quite where I wanted them and, well, they looked a bit too much like cabbage rolls–i.e. washed out.  Then came work.

And then came Dinner for Eight–as in a mid-week sit-down dinner party.   Guests included a picky child eater and another with medical issues that precluded various stand-bys.  Yet another doesn’t drink.  None are vegetarians.  Fortunately, all are loving friends who tolerate my mad scientist in the kitchen aspect.  In other words, they took the news that they would be guinea pigs for a vegan feast quite well.  “What can I bring?” they said.  Salad, bread, dessert.  I would handle the rest.

The rest in this case was soup and the main course.  After rummaging about the fridge and my cookbook collection, I decided to make David Tanis’ mushroom ragout and a spicy carrot soup.  In other words, it was going to be all about the stocks–vegetable for the carrots; mushroom for the ragout.   I got to work chopping and sauteeing.

I served the soup in cups before dinner and the ragout in its own serving dish.  Guests had the choice of pasta or polenta strips.

All was well–picky child eater astonished his mother by asking for seconds on the soup (though his pasta, unsurprisingly, came nowhere near a mushroom.)  There was enough choice so that personal predilections and limitations could be managed by all.  As an unexpected bonus, it was also, I realized, a budget feast–the two pounds of mushrooms I used came to less than $8.  Carrots, too, are inexpensive.  In other words, it came out to less per person than going out to a pizza joint.

And the next day, exhausted, I had carrot soup for lunch.  It was delicious.  Better yet, it was already made.

Carrot Soup with Harissa and Lime

The following is pretty much a minor riff off of Deborah Madison’s carrot soup with onion relish.  If I could only have one vegetarian cookbook, it would be Madison’s Vegetarian Cooking for Everyone.  I’ve never had a recipe fail me and she gives excellent advice on how to customize her recipes and what flavors go with what.    I use her vegetable stock recipe, but pretty much any standard vegetable stock will do–i.e. saute an onion slowly, add chopped carrots, celery and other non-bitter vegetables, salt and pepper and some milder herbs.  Saute a little more, then add water and simmer for 40 minutes.

4 T olive oil (not extra-virgin)
1/2 medium onion, finely chopped
2 T. shallots, finely chopped
app. 6 cups carrots, chopped
1 bay leaf
1 t, paprika
1 t. ground cumin
1/2 ground coriander
3 stalks fresh parsley
3 T. white rice
salt and pepper
7 cups hot vegetable stock (chicken will also work if you’re omnivorous)
1 lime
harissa paste.

In a large saucepan, heat the oil.  When heated, added onion and shallots, reduce heat and cook gently until they soften and start to brown.  Stir frequently to keep from burn.  Add all other ingredients except the stock, lime and harissa.  Stir and saute a bit more.  The idea is to use the oil to release the flavor of the ingredients, so give it a few minutes.  Add the stock, bring to a boil, then simmer, partially covered for 25 minutes, until carrots are soft.

At this point, you can remove the soup and puree it in a blender or with a food mill.  I have an immersion blender, so I just lower the heat and give it a whirl through the soup until a nice puree is create, though with some carrot pieces left over.  I then squeeze in the juice of one large lime and check seasonings.

Serve and add a small dollop of harissa to the cup of the adults, but probably not the children.  If you don’t have harissa, a chile sauce can be used–better yet, sriracha sauce.

Serves 4 as a light main course, 8 as an appetizer.

Vegan Challenge Day 7. Chocolate Break

Hot spiced chocolate with a dollop of whipped coconut cream.  Silky, rich, non-dairy with hints almonds, orange, dates and cinnamon.

Hot spiced chocolate with a dollop of whipped coconut cream. Silky, rich, non-dairy with hints almonds, orange, dates and cinnamon.

I tried to be good, I really, really did.  When the sweet tooth called, I tried to sate it with fruits.  But then I cut my finger on the mandolin slicer and I got grumpy.  And tired.

In other words, it was time to play with chocolate.  Not cocoa; the real unctuous stuff with cocoa butter.  Furthermore, I wasn’t about to let the lack of baker’s chocolate hold me back.  Yes, there’s sugar in dark chocolate, but it was going to a good cause: improving my mood.

I’d started playing with cocoa and almond milk a couple of days earlier after coming across a hot almond milk drink that used dates and maple syrup as sweeteners in Donna Hay (an Australian food mag).  It wasn’t bad, but it was a bit sweet and bland.  I added cocoa.  Better.

But then I progressed from there–to a brew that’s not a pallid imitation of hot cocoa, but its own thing–I added orange flower water as a nod to the flavorings often used with dates in the Middle East.  The cinnamon is there for a kick.

It’s great hot, but it’s also good at cooler temps, when it becomes pudding like.  At really cold temps, it’s a bit ice-creamish.

And, yes, I’m feeling better.  Thank you.

Hot Spiced Chocolate

Almond milk
Dates (pits removed and chopped)
chocolate (unsweetened or dark.  Unsweetened cocoa can be subbed)
Cinnamon

Orange flower water or other flavoring (i.e. vanilla, brandy) of your choice
Maple syrup (optional)
Coconut cream (i.e. thick stuff on top of a can of coconut milk or sold on its own by Trader Joe’s)

No amounts given above, because this is the sort of thing you should personalize.  Basically, the ratio is one date to one cup of almond milk.  So, place milk and dates in saucepan.  Add a nice shake of cinnamon–almond milk has a lighter taste than regular milk, so adjust accordingly–and a half-ounce square of chocolate or  1-1/2 t. of cocoa per cup.  If using unsweetened chocolate or cocoa, add about a half t. of maple syrup per cup.  If using dark chocolate, you probably don’t need it.  Slowly heat mixture so that it comes to a low boil, then simmer over the next 8-10 minutes, whisking to keep the chocolate from burning.  The point of doing this slowly is to give the dates a chance to soak up the liquid and grow soft.  Add flavoring–a small amount–about a 1/4 t. per cup.

At this point, you can use an immersion blender to grind up the dates or put the contents in a regular blender and give it a whirl.

Pour contents into cups.  If desired, top with a dollop of whipped coconut cream.  The cream, even if not whipped, will help give the chocolate a nice full body and improve the mouthfeel.

Any leftover hot chocolate can be chilled and then frozen like an ice cream.  If you don’t have an ice cream maker, put the chocolate in a freezer and stir eevery 20-30 minutes until frozen.  Slivered almonds or walnuts are a nice mix-in for this.

I haven’t tried it yet, but I suspect that you’ll get something akin to a fudgesicle if you freeze it in an ice pop mold.

Vegan Challenge Day 5. Lima Beans, yes lima beans done the Mayan way.

Lima Beans with Pepitas and Chile is a variation of a Mayan dish--easy, fast and delicious with all sorts of things.

Lima Beans with Pepitas and Chile is a variation of a Mayan dish–easy, fast and delicious with all sorts of things.

After ingesting sugar through sheer absent-mindedness the first couple of days, I’ve now gotten into the challenge groove.  I’ve hit the sweet spot where I don’t absent-mindedly eat stuff on the unapproved list, but I’m also not bored with what I can eat and I’m not missing butter yet.  Well, not too much.  I’m thoroughly in experiment mode as well, which has its ups and downs–the sweet potatoes Anna I made tasted great, but the top stuck to the pan and, well, it looked like a mess, so a few tweaks are needed before I give you the recipe.

The following, though, needs no tweaks.  It’s also not mine, but while it’s not much to look at, it’s delicious.  In fact, it’s so delicious, economical and relatively easy, I have no idea why it’s not better known.  Is it because lima beans are too strongly associated with dreary, tasteless versions of succotash?

Lima Beans with Chile and Pepitas is way better than that. It can be eaten hot or at room temperature, so it’s good for making ahead or making for dinners.  It can be served all sorts of ways.  I like it with tortilla chips, my husband likes it with bread.  But enough of that, on to the recipe, which is from The Whole Chile Pepper Book by Dave DeWitt and Nancy Gerlach.  It’s not their original recipe either–in fact this recipe, minus the onions, is ancient–as in ancient Mayans.  Everything in it, except the onion, is indigenous to the New World.   Served with tortillas, the dish becomes a wonderful exemplar of the Three Sisters–squash, corn and beans–the agricultural mainstays of the Southwest Indians–each crop facilitating the growth of the others.  Really, it ought to be part of Thanksgiving, instead of so unknown–it really gives on a sense of the New World’s bounty.

This serves four as an appetizer.  I double it if I’m serving it as a main course.

Lima Beans with Chile and Pepitas

4 Jalapeno chiles, chopped and seeded.  (Other chiles will do, but adjust for heat–Jalapenos are a mild hot chile, so use less of most chiles.

2/3 c. lima beans. (fresh or frozen–I’ve never actually had it with fresh, so I can vouch that frozen works with this one.)

1/2 c. pepitas or pumpkin seeds, hulled.

1 medium tomato chopped.  (if it’s not tomato season, use a couple of T.s of tomato paste.)

2 T. chopped onion

Salt
1 T. fresh cilantro (while less authentic, subbing in fresh parsley won’t be the end of the world.  ) finely chopped, with stems removed.

Toast pepitas in skillet for a few minutes, stirring to keep them from burning.  (I’ve been known to toast nuts in the microwave–but you really have to watch the burning–stopping and stirring every 30 seconds.)  Once toasted, grind pepitas and set aside.

Cook lima beans in water until done and drain.

Simmer beans, chile, pumpkin seeds, onion, tomato (or tomato paste) and cilantr and salt o in sauce pan for 10 minutes over low heat.  Stir gently to keep beans from sticking, but avoid smashing beans.  Check seasoning, adjust.

Serve.  Told you it was easy.

Brussels Sprouts for Dinner? Vegan Challenge Day 3

SAMSUNG CAMERA PICTURES

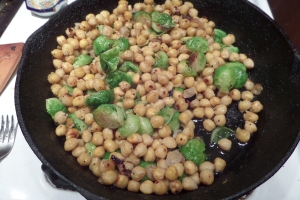
Romy’s Brussels Sprouts and Chickpeas–budget vegan style sizzling away. A squeeze of lemon and it’s ready to eat.

Well, actually, there’s no question about it.  Last night, my main course was brussels sprouts and garbanzo beans.  And, yes, it was actually really good and, no, I don’t like brussels sprouts any more than you do.

While I eat a ton of garbanzos/chickpeas when veganing out, or, frankly just eating, Brussels sprouts definitely taste bitter to me, though I also think they’re cute–no other vegetable looks quite so like doll food.

However, I was given Bitter by Jennifer McLagan for Christmas and she makes a compelling case for the interesting complexity of bitter foods.  While most of her recipes aren’t vegan or even vegetarian, several looked worth an attempt at adaptation–including “Rony’s Brussels Sprouts and Chickpeas.”  And, indeed, it was.  I made my own vegetable stock to substitute for the called-for chicken stock and threw in some lemon to brighten it a bit at the end.   All of this took some work, but it could be made quickly if you have stock on hand and used canned chickpeas.  I think freshly soaked chickpeas have a more delicate flavor, but canned ones are perfectly edible.

I served it with brown rice and a simple green salad, which turned out to be a nice blend of flavors and textures.  Everything went with everything and can be eaten at room temperature, which means easy leftovers for lunch.  Providing there’s anything left.

So, I now present:

Romy’s Brussels Sprouts and Chickpeas with Vegan and Budget Substitutions

1 c. dried chickpeas soaked overnight or 2 15 oz. cans

1/4 c. olive oil (original calls for EVOO, but, again, standard will do here and has a higher smoking point)

1 shallot finely chopped.  (I love shallots, but if you’re starving, 1/4 of onion will work

3/4 c. stock.  I use Deborah Madison’s guide to vegetable stocks for mine.  Use a straight vegetable stock, not mushroom.   Canned vegetable stock is pretty awful, so this is worth learning to do and making ahead.

3 c. more or less of brussels sprouts.   Cut off the bottoms, peel off discolored leaves and cut in half.

Salt and Pepper

2 T. dry sherry

Lemon juice to taste.

If using soaked chickpeas, place them in saucepan, cover with 2 inches of water and bring to a boil.  Reduce heat, cover and simmer until tender–30 to 50 minutes, depending on age of bean.  If using canned, drain and rinse really well.

When beans are done, remove from heat, stir in 1 t. salt, let cool a few minutes and then drain well.   You want the outside of these beans dry, so this can be done well ahead of time.

Pour 2 T olive oil in large frying pan with lid and heat over medium.  When hot, add the shallots and cook gently ’til soft.  At which point, add the chickpeas, kick up the heat a notch, add salt and pepper and cook until chickpeas have some nice brown spots on them.  Add 1/4 cup of stock and, as it sizzles away, use your spatula to scrape up the yummy brown bits on the bottom of the pan.  Pour everything in pan into a bowl and set aside.  If there’s anything still sticking, get it out.

Pour in 2 more tablespoons of oil and put pan back over medium heat.  Now it’s brussels sprouts time.  When oil is hot, add the sprouts and try to get them cut side down.  Cook ’til sprouts are dark brown on one side–this won’t take long–around 4-5 minutes.  Then add  1/2 cup of stock.  Reduce heat,  stir things around and get them unstuck .  Cover and cook til sprouts are tender, but have a bite to them.  This won’ take long, just a few minutes, depending on the size and freshness of the sprouts.  Mine took about five.

Add the contents of the chickpea bowl and the sherry and cook briefly ’til everything’s properly warm.  Check seasoning, add a squirt of lemon.

Serves 3-4–either hot or at room temperature.

I’m BACKKK and It’s Time for my Annual Vegan Challenge.

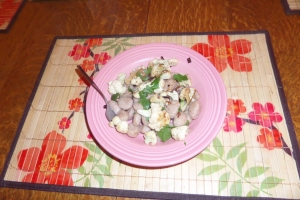
Cauliflower-Caper salad.  Quick, easy and make-ahead.

Cauliflower-Caper salad. Quick, easy and make-ahead.

I am a true omnivore, though a fairly picky one.  I have tried them multiple times, but I will never like an avocado.  My omnivorousness means that, yes, I do eat high on the food chain at times, but it also means I truly love my veggies, fruits, legumes and grains.

The result of my omnivorous habits, however, is that gluttony and I are best buddies during the holidays.  Your grandma’s peppermint brownies?  I’m there and whipping up my own version for comparison.  December’s when I work my way through a bit more of the Gourmet cookie book (the gingerbread is a new favorite, sorry Maida Heatter.)

But even when I’m surfing on the fat of the land, I’m thinking ahead.  A few years ago, I started going vegan for a week in January.  The first time, it was hard.  I wasn’t used to cooking without cheese and even six years ago, it was harder to find restaurants with vegan options than it is now.  Each year since, I’ve tinkered with my challenge–two years ago, I was a gluten-free vegan–a diet that didn’t work for me.  (I felt worse instead of better.)  Last year, I spent two weeks as a vegan with no white flour or processed sugar.  I felt so good that this year I’m doing the same thing, but for three weeks. (And, yes, well okay, I really, really pigged out–see above reference to new gingerbread recipe.)

Here’s the funny thing, I’ve actually started to look forward to my challenges.  It’s a time to rediscover foods and reset my sweet tooth at a healthier level.  What’s even odder is that my family looks forward to it.  Instead of a diet, it’s a culinary adventure and no one wants to miss out.  New recipes get tried and the best of them (or easiest) work their way into the regular meal rotation.

At least at dinner.

Truth is, I don’t really like to cook more than once a day.  I plan dinner, but I’ve no interest in planning breakfast or lunch.  Thanks to last year’s challenge, I have the breakfast part down–my chocolate-banana almond-milk smoothie serves me in good stead morning after morning.  Lunch is usually leftovers.

Only sometimes, like today, there weren’t any.  So I tossed together my cauliflower-caper salad.  It’s so simple, I barely consider it a recipe, but it actually is one, I suppose.  Unlike leafy green salads,  this one can be made and dressed ahead and transports well.

Cauliflower-Caper salad

Raw cauliflower (don’t use pre-cut)
1 T capers
fresh pepper
small amount of finishing salt–well, any salt will do, but I like the look of pink salt on this
2 T. Extra virgin olive oil
1 t. red wine vinegar
1 T. fresh parsley, finely chopped (optional)
Wash and cut cauliflower into small pieces.  I usually use about a third of a medium-sized head for this.  If cauliflower is extra-tough, blanch it for one minute in boiling water.  Otherwise, raw is just fine.

Add other ingredients.  Toss.  Eat or wait.  If refrigerated, let it sit out for a few minutes so that the olive oil melts before eating.

For me, at least, this doesn’t make a complete lunch, so I have some walnuts and dried apricots to add some protein and a touch of sweet to the meal.

An Apple Every Other Day

Apples, sweet potatoes, almonds, ginger and mint come together in these vegan filo packet.

Apples, sweet potatoes, almonds, ginger and mint come together in this vegan filo triangle.

When I first considered spending a week on apples, I didn’t think I’d invent any recipes.  Apples are ancient and well-loved–I expect a rather large and heavy volume could be comprised of apple recipes.  And there still would be more.  I looked forward to unearthing long-forgotten apple recipes and reviving them.

However, once I had the apples in my hand, ideas began to flit through my head.  Apples, in a way, are simple–a good apple has a nice mix of tart, sweet and crunch.  Its taste is distinctive, but it plays well with others.  While Americans often think of apples and cinnamon in apple pie and apple sauce; apples do well with ginger and mint and can show up during the first part of dinner as well as after.

These filo packets make a lot out of a little.  While I find working with filo a bit of a pain, once made, these triangles can be tossed in the freezer and baked as needed.  They make a good appetizer, but I also like these triangles as a mindless dinner–four triangles and a salad does it for me.  The apples and sweet potato give them an autumnal quality–so much so, that I would bring them to a Thanksgiving-themed buffet, particularly since they’re easy to carry.

I’ve used coconut oil instead of butter to make these packets vegan, but butter would certainly work as, I suppose, would margarine, but I don’t like foods, in general, that pretend to be something else, so I don’t use it.  Coconut oil, being solid at room temperature, creates the necessary flakiness for filo.  It doesn’t have a lot of taste, so I’ve found adding salt to the melted oil helps for this.

Apple, Sweet Potato Triangles 

1 medium sweet potato, peeled and chopped
2 medium apples, peeled and chopped
1/4 c almonds chopped
1 shallot, chopped small
2 T citrus marmalade (I used lemon, but other flavors will do)
1 T fresh mint
1 t. fresh ginger, grated
salt
pepper
lemon juice (optional)
1/2  c. coconut oil
1 package filo (app. 20 sheets)

Preheat oven to 350 degrees F.

Make sure that the apples and sweet potatoes are chopped into small, fairly equal pieces.  You don’t have to be precise about this, but you want them to kick at the same rate.  Put them in a bowl and mix in almonds, shallots, mint, ginger, salt and pepper to taste.  Then stir in marmalade.  Check again–if your marmalade is sweet, add lemon juice.  This can be done ahead of time, just cover refrigerate, the marmalade will help it keep the apples from turning brown.

When ready to assmble, open the filo package.  Use a damp dishcloth to cover the unused filo while working.  Meanwhile melt the coconut oil and salt it lightly. (I usually do this in the microwave.)  Carefully lay down one sheet of filo and brush with melted coconut oil, cover with another sheet of filo, brush and repeat until you have five sheets–do *not* oil the fifth sheet.  Instead, near the long bottom of the sheet, place five teaspoons of filling equal distances apart and cut into five equal strips.  Fold the bottom corner so that it covers the filling, then fold along the triangle’s hypotoneuse so that the middle corner of the triangle  reaches the corner opposite of it.  You are folding it like a flag, continue doing this until the strip of filo is completely folded.  Continue doing this until the filo is used up.  You should have about 20 triangles.   The triangles can be baked or frozen at this point.

Place triangles on baking sheet and brush tops  with melted coconut oil.  Pop into oven and bake for 25 minutes if fresh, 45 minutes if frozen.

Serve warm.  Makes 20-24 triangles.


Eggplants and Arugula–When Opposites Attract

SAMSUNG CAMERA PICTURES

Eggplant and Arugula Salad–the sweet mildness of eggplant is balanced by the assertive bitterness of the arugula. Quick, easy and unexpected

The first time I paired eggplant and arugula was years ago.  It was one of those thrown together from the garden things.  I had yet-another-eggplant and the arugula was sprouting.  So I sauteed the eggplant, washed the arugula and stuffed both into a pita pocket.  It was not bad, not bad at all, I thought.  And I’ve been putting the two together ever since.  The sweet mildness of the eggplant balances the green, fresh bitterness of the arugula.  A touch of balsamic vinegar adds a little more sweetness and tartness.

While I still make eggplant and arugula pita pockets, today was boiling hot and called for a salad.  The following takes no time (less than 10 minutes) and, thanks to the eggplant, makes a satisfying lunch.  If you make it ahead of time add the arugular right before serving.   And, yes, you can stuff it into a pita pocket.

Eggplant Arugula Salad

1 Japanese eggplant
handful of arugula
1 carrot
olive oil
balsamic vinegar
salt
pepper

Wash vegetables.  Using a vegetable peeler, cut slices of eggplant lengthwise.  Heat a tablespoon of light olive oil in heavy frying pan.  When hot, saute the slices of eggplant (a few at a time) over medium heat, turning once.  This will take very little time.  Remove slices when slightly browned, adding more slices and additional oil if needed.  Salt eggplant lightly and set aside.  Put arugula in salad bowl.  place eggplant on top.  Sprinkle with balsamic vinegar–you won’t need much.   Using vegetable peeler, slice strips of carrot over salad.  Add pepper and a little more salt.  Toss together lightly.

Serves one as a main course, 2 to 3 as a side salad.